Showing posts with label Technical file. Show all posts

Tuesday, 5 April 2016

Technical - scars using moulds

Moulds are a time saver as they’re ready to use. All you have to do is cast them with gelatine, rubber, plastic or even silicone.

Gelatine is safe to use on the skin (mentioned in previous technical files) and can be cast, or used to make moulds. It’s also reusable, cheap and easy to get hold of. Another advantage to gelatine is that you can freeze it for weeks or even months for future use.

What is silicone?

This is a soft, colourless rubber used for making prosthetics and is easily pigmented to provide realistic skin tones. It also has high elongation with dimensional stability which can be used on the skin several times. It’s often used for creating life like animals, dragons, monsters, body parts and also realistic cuts, scars, wounds, lumps and bumps. This product has been popular as a medium for moulding. It can also withstand temperatures approaching 400 degrees. You can also paint over dried silicone. Once it’s dry, you can remove it from the skin and reuse it again. Like gelatine, they’re safe and can also be re-used.

Platsil gel:

‘Platsil gels are relatively inexpensive and deliver natural flesh like results. They can be used as mould rubbers, to create prosthetic appliances. Unlike any other silicone product, it is quick and easy to use, also has a translucent colour.

This product is used by the world’s top Prosthetic technicians. It has been used in movies such as The Iron Lady, Harry Potter, Lord of The Rings and Pans Labrinth.’

10, P.G. (1638) PlatSil gel 10. Available at:

Harry Potter’s makeup artist, Nick Dudman quotes: “we used platsil gel throughout Harry Potter, using nearly 4 metric tonnes on Deathly Hallows Part 1 and 2 alone. I used it because it is reliable and gives me the realism of movement I require. It has the perfect qualities for prosthetic appliances.”

Another artist, Waldo Mason quotes “I used platsil gel for the creation of Ernest Manby’s body in BBC’s Ripper Street because it was soft. It provided the body with effective realism and movement.”

Gorton, N. (no date) Special FX & Modelmaking. Available at:

Example of a bullet wound mould made using silicone

LanguageEnglishDeutsch, J.H. (2015) SFX // Bullethole. Available at:
http://www.janherms.de/portfolio/sfx-bullethole/ (Accessed: 11 April 2016).

Technical lesson six:

Model name: Grace
Skin type: dry
Skin tone: fair skin with neutral undertone
Natural eyes/contacts: natural eyes
Allergies: none
Medication: none
Any open wounds/scars, cuts etc.: none

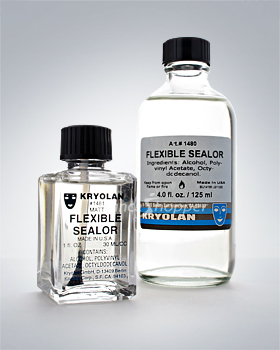
Required products/materials: mould, Pros-aide adhesive, pro-clean (this is a gentle oily adhesive remover), Kryolan supra colour palette, wound filler, cotton buds, stipple sponge, Kensington Gore fake liquid blood, witch hazel, Kryolan translucent powder, scissors (optional), makeup brushes (powder puff and small pointy brushes, preferably non-beauty ones for the colouring).

What is Pros-aide adhesive?

‘For over 30 years, Pros-aide adhesive has been the worldwide industry standard for use in the professional medical prosthetic and special effects make-up industries. Pros-aide is specifically formulated for sensitive skin and is non-irritating. All Pros-aide products are water-based and completely safe. When dry, Pros-aide adhesive gives absolute waterproof bonds to all skin surfaces – the kind of adhesion that is required with medical prosthetic applications and the demanding needs of professional special effects make-up artists. This product has been used in numerous projects both on stage and TV.’

Authorized, U. (no date) Medical grade adhesive - special effects makeup - Prosthetic adhesive - skin adhesive. Available at: http://www.pros-aide.com/ (Accessed: 11 April 2016).

Image reference: Prosthetic adhesive no. 2 by Kryolan - costumes wigs theater makeup and accessories (no date) Available at: https://www.mallatts.com/store/theatrical-costume-makeup/skin-adhesive-and-adhesive-remover/prosthetic-adhesive-2-by-kryolan.html (Accessed: 11 April 2016).

Step-by-step guide:

Before starting the practical, I set up my station and got rid of any bags, scarves and coats that were in the way for health and safety reasons. I then placed a towel around my model again for hygienic, health and safety reasons. Next, I ensured the area I was working on was clean (the arm). Grace had no product on her arm therefore I went straight in with the mould.

Sue had given us all a mould to work with. You may have to trim the edges of the mould with scissors however this is optional. I didn’t trim mine at all as I thought it looked more natural with rough edges rather than straight ones.

I firstly applied a small amount of the Pros-aide glue onto the area of the arm I wanted to place my mould on with a cotton bud. I also applied this same glue onto the back of the mould (ensure the wound surface is covered; go right up to the edges). Make sure you close the glue lid once you’re done using it otherwise it will dry out and go lumpy. Before placing the mould onto the skin, you have to make sure the mould (and skin) are both dry. You’ll know it’s dry once it goes clear like DUO.

After it’s dry, stick the mould onto the skin and press hard. This is really important as you don’t want it to fall off. Next, using another clean cotton bud, dip it into witch hazel and go over the edges over the mould to soften them. Do this in a downward motion.

Now, you must powder the area using the Kryolan translucent powder and a powder puff brush. After you’ve powdered, and spot a hard edge, you’ll need to go back in with the witch hazel and soften it. Ensure not put witch hazel underneath the mould as this will cause it to fall off.

Once you’re happy with the application of the mould, you can start the colouring. I first coloured the inside of the cut with black (071) supra colour using a thin pointy brush. It was also optional to use Sue’s bruise wheel from Kryolan which consisted of deep plum colours however I stuck to my supra colours. For the outer corners of the wound I mixed red (079) and the black together to achieve a dark red. I also applied red just around the cut, using a stipple sponge. I patted this on, as it irritates the skin to swish it around due to its texture. I also used my fingers to apply some of the same red on areas I thought needed colour. Ensure to blend this out for a more realistic effect.

For the final part of the colouring, I applied the fake blood and wound filler. I took some wound filler out from its pot and applied it gently to the centre of the cut (where I applied the black) using the same brush. You don’t want to go too over the top with this as then it’ll just end up looking fake. I also used some of Sue’s Kensington Gore fake liquid blood. I used a stipple sponge to apply this blood around the cut and empty areas of the arm as Sue told us to not just concentrate on the cut itself and look beyond it.

To remove this, gently peel the mould off the skin. You can wipe any excess glue from the arm using the Pros-aide adhesive remover and a cotton bud. Clean off any remaining makeup from the skin with a cleanser and wash thoroughly with water. Moisturisers can also be used after removal to prevent the skin from drying. Finally put the mould into the bin.

Reflection:


Overall, I was very proud of my work as it was my first time doing a cut using a mould. Sue gave me great feedback and said the wax is blended well into the skin. She also said the colouring of the actual cut is great itself however I could’ve applied more colour onto the rest of the arm to prevent it from looking stuck on. 

Monday, 4 April 2016

Technical - dirt

All through the historical backdrop of the screen, make-up has set the state of mind for some a character. The most-utilised product is presumably the one regularly underestimated: dirt. There
are different products you can use to create a dirt effect on the skin which include:

Dirt powder – this is dark, highly pigmented loose powder used to give the skin a dirty, dusty look. The realistic colours of these powders create a natural look. They have a loose consistency that can easily be applied to enhance a characters makeup. Dirt powder has the same look and feel of actual dirt and can also be used to create a realistic effect of being covered with sooty ash. It is safe to use on hair, skin and clothing. 

Company, 2014 Alcone (2006) Mehron Texas dirt. Available at: http://www.alconeco.com/mehron-texas-dirt (Accessed: 10 April 2016).

Dirt spray – ‘dirty down sprays are designed to dirty and age costumes and props, used in films, TV and theatre. These sprays are translucent, water-soluble dyes so you can still see the surface beneath them, they can be made wet again even after being left to dry and can be smudged with a daft cloth to give the effect of real stains. They can be applied on most fabrics, glass, mirrors, leather, timber, furniture, paper, card, metal, painted surfaces, plaster, brickwork, stone, plastics and more.

This product is a dye, therefore it may cause permanent discolouration to all types of absorbent and non-absorbent surfaces. Dirt sprays are solvent based.’

Dmedia, 2 (2016) Dirty down sprays 200ml. Available at:
http://www.screenface.co.uk/sfx/dirt-grime-ice/dirty-down-sprays.htm (Accessed: 10 April 2016).

Fullers earth – this is a fine, light dust used to create the appearance of dust or dirt. It can also create effects such as cracking, breaking, stone and mud. This product is completely safe to use on the face and body.

Fullers earth

Reserved, A.R. (2016) Fullers earth Greenstripe. Available at:
http://www.rogergeorge.com/special-effects/dust-dirt/fullers-earth (Accessed: 10 April 2016).

Technical lesson five (continued):

Model name: Lia
Skin type: combination
Skin tone: medium skin with yellow undertones
Natural eyes/contacts: natural eyes
Allergies: none
Medication: none
Any open wounds/scars, cuts etc.: none

Required products/materials: Kryolan fullers earth, hairdryer, water, a bowl, dirt spray and Kensington Gore fake liquid blood (spray form).


Step-by-step guide:

Firstly, I poured some of the Kryolan fullers earth into a mixing bowl (a quarter of the bowl) and added water to it until it got a bit thick (not watery/runny). You won’t be using any brushes to apply this product onto your desired area therefore make sure you have washed your hands beforehand. When I felt like it was thick enough, using my fingers I applied this onto my models hand, dragging it across the arm. Make sure the application is smooth and not clumpy. Once you’re happy with this, dry it using a warm hairdryer for about 30 seconds. After its dry you won’t be able to move the product around anymore as it’ll just fall off the skin.

It’s now time for the colouring. I used Sue’s Kryolan dirt sprays in shades brown, black and grey. Hold the spray away from the hand (about 30cm) otherwise you’ll just end up with a blob of colour. Mix the colours up and ensure to go in between the fingers, knuckles and most importantly the nails. As I got closer to the fingers, I applied more of the darker spray.

For a shoot/scene it’d be ideal for you to give the nails a chipped effect to make it seem more realistic.

I also applied some of Sue’s Kensington Gore fake liquid blood which was in a spray tube. I sprayed this onto the arm, again holding it 30cm away. When blood is applied on fullers earth, it tends to dry rather than drip.

For the removal, just wash off the product from the arm/hands using warm water. Any remaining colour such as blood can be removed with a cleanser or almond oil.

Reflection:

I had used dirt powder before and I found it much easier to use than the dirt spray. I believe powder looks a lot more natural than spray as you can build up the colour rather than creating blobs on the skin.

It was my first time doing this therefore I was just experimenting with the colours. I didn’t quite like the overall result of the fullers earth as I felt like it looked clumpy. Where I went wrong is before the process of the drying, I didn’t blend out the product enough onto the skin. Sue also told me I applied too much of it and if I had used less, it would’ve looked a lot more natural. Also with the blood and the dirt, I applied it too close to the skin resulting to an unnatural look. I created blobs, I especially with the blood as I had never used liquid blood in a spray form before.

Technical - black teeth

Technical – black teeth:

‘Black teeth are common in our daily life. Professionals say that if you drink coffee, strong tea, cola and other colourful food for a long time, you’re more likely to have black teeth. It is hard to remove the pigment which deposit on your teeth. And after a long time the tartar will form in large quantities. The original yellow teeth even will turn black slowly.

Other bad habits such as smoking and chewing betel nuts can also cause black teeth. The dark pigment not only deposits on the surface but comes into the tooth enamel. Besides, the smoke itself which was sucked into the mouth contains a lot of black particles. Some of the particles directly adhere to the teeth and then they will form ugly dark spots. So having good living habits is important.

Usually endogenous black teeth appear more stubborn. The most common endogenous black teeth are caused by tetracycline, a kind of antibiotics. The drugs will influence the tooth tissues in the process of tooth development and cause permanent discoloration. When the situation is very serious the whole tooth will become black. The degree of colour change depends on the quantity of drugs and the time length of taking drugs. Sometimes although the teeth may look very smooth, there are many invisible sockets and ditches on the surface. A lot of bacteria hide in the narrow and deep ditches and the continuous decomposition of sugar produces acid in the mouth. Moreover, the lack of calcium can damage tooth enamel. Once the tooth enamel is corroded, the colour of teeth will change gradually from white to black. Finally they will detach completely.’

(no date) Available at:
http://www.ismile-dental.com/en/article.php?id=89 (Accessed: 9 April 2016).

Other causes of tooth discolouration include:

  • ‘Tooth decay – e.g. eating too many sweets. You should see a professional for treatments because the old fillings or improper therapy can also lead to tooth discoloration.
  • Ageing – the tooth enamel will get thin and lose transparency along with the growth of ages. Relatively the yellow linings will thicken and make teeth become more and more yellow and black finally.
  • Dental materials – some materials used in dentistry, such as amalgam restorations, especially silver sulfide-containing materials, can cast a grey-black colour to the teeth.
  • Poor dental hygiene – inadequate brushing and flossing to remove plaque and stain-producing substances like coffee and tobacco can cause tooth discoloration.
  • Genetics – some people have naturally brighter or thicker enamel than others.
  • Environment – excessive fluoride either from environmental sources (naturally high fluoride levels in water) or from excessive use (fluoride applications, rinses, toothpaste, and fluoride supplements taken by mouth) can cause teeth discoloration.’

Tooth Discoloration (teeth darkening) from MedicineNet.com (1996) Available at: http://www.medicinenet.com/script/main/art.asp?articlekey=43091 (Accessed: 9 April 2016).


All of humanity (no date) Available at: 
https://uk.pinterest.com/pin/510103095264713294/ (Accessed: 9 April 2016).

Technical lesson five:

Model name: Lia
Skin type: combination
Skin tone: medium skin with yellow undertones
Natural eyes/contacts: natural eyes
Allergies: none
Medication: none
Any open wounds/scars, cuts etc.: none

Required products/materials: cotton buds, tooth enamel and surgical spirit.

What is tooth enamel?

This product is similar to nail polish, an alcohol based varnish applied on the teeth to make them look dirty, or as if they are missing. It adheres to the surface of the tooth perfectly, without damaging the enamel or the gums. In order to apply this, the teeth must firstly be dried with a tissue and the bottle must be shook. After, you can apply this on the teeth and wait for it to dry as then it becomes waterproof. It is durable and resists saliva for several hours. Tooth enamel must not be used on false teeth as it can be difficult to remove. To remove this product you must soak tissue in an alcoholic liquid such as surgical spirit and gently rub it against the teeth. To get rid of stains in between the teeth, you must brush the teeth as you normally would with toothpaste. This product is often used for special effects and should be included as part of every artist’s kit.


PROFESSIONAL, K. (2016) Professional make-up. Available at: https://us.kryolan.com/product/tooth-enamel (Accessed: 9 April 2016).

What is surgical spirit?

Surgical spirits can be purchased from any chemist or pharmacy e.g. Boots. It is completely safe to use on the skin and on the teeth area. It’s often used in hospitals to help treat wounds. It can also be used during pregnancy and lactation. It’s best to keep this product out of the reach and sight of children as it contains castor oil which may cause skin reactions.

Express, B. (2016) Surgical spirit. Available at: 

Step-by-step guide:

Before starting the practical, I set up my station and got rid of any bags, scarves and coats that were in the way for health and safety reasons. I then placed a towel around my model again for hygienic, health and safety reasons.

I next dried my models teeth using cotton buds. I then shook the tooth enamel I was about to use for a few seconds. Next, I dipped a clean cotton bud into the black nicotine coloured tooth enamel and applied it on certain areas of the teeth. I also did the same thing with the yellow mustard colour tooth enamel using a different cotton bud. If any colour goes on the lips, you can remove it using surgical spirit and a cotton bud. Follow the same procedure to remove any product on the teeth. Note that you shouldn’t apply tooth enamel on newly bleached teeth. If you wish to colour inside the mouth, use food colourings.

Reflection:

I find it quite difficult to use this product as, as soon as I applied it on the teeth, when I wanted to go over it using another layer, the cotton bud would completely take the first layer off. It also tended to dry very quickly on the cotton bud and just wouldn’t stick onto the teeth which resulted to a patchy look. If I was to do this again, I'd probably use a paintbrush to apply the product on rather than a cotton bud.

I preferred the black tooth enamel to the yellow as it looked very weird on the teeth. I also didn’t like the taste of it or the process of removing it. Surgical spirit didn’t taste pleasant at all. I’d hate to have this done on myself again however doing it on someone else for a shoot/scene, I wouldn’t mind.

Saturday, 2 April 2016

Technical - illness/black eye

What is an illness?

This is a condition of being unhealthy in your body or mind. Some illnesses are minor, meaning they come and go quickly such as a cold or flu whereas other illnesses are continuing, perhaps a lifetime such as asthma or diabetes.

What is a disease?

‘A disease is a particular abnormal condition that affects part or all of an organism. The causal study of disease is called pathology. Disease is often construed as a medical condition associated with specific symptoms and signs. It may be caused by factors originally from an external source, such as infectious disease, or it may be caused by internal dysfunctions, such as autoimmune diseases. Diseases usually affect people not only physically, but also emotionally, as contracting and living with a disease can alter one's perspective on life, and one's personality.

Death due to disease is called death by natural causes. There are four main types of disease: pathogenic disease, deficiency disease, hereditary disease, and physiological disease. Diseases can also be classified as communicable and non-communicable. The deadliest disease in humans is ischemic heart disease (blood flow obstruction).’

Disease (2016) in Wikipedia. Available at:
https://en.wikipedia.org/wiki/Disease (Accessed: 2 April 2016).

What is a sickness?

Often people confuse the words sickness and illness together as they believe they mean the same thing however a sickness is believed to be when ‘a part of the body is broken or malfunctioning. Any medical diagnosis or psychiatric malady is a sickness. Illness, on the other hand refers to our emotional, psychological, and/or spiritual reactions to our sickness. Most patients report that the pain from their illness is far more severe, long lasting, and personally traumatizing than is the pain from their sicknesses.’ 

Illness, H.Y. (2016) SICKNESS VS. ILLNESS. Available at: http://www.healyourillness.com/page.asp?page=3332 (Accessed: 2 April 2016).

Symptoms of an illness:

’There are symptoms caused by an illness, or the damage it is doing. If you have a bacterial infection, the bacteria could be releasing toxins that cause pain or discomfort. Discomfort from an illness is immensely varied, and can range from a minor feeling of unease, to unrelenting pain from a serious cancer.

There are symptoms that indicate your body is fighting an illness such as inflammation, pain, swelling and vomiting. There are also symptoms of healing, when your body is replacing cells that were damaged by the illness. These may include itching, swelling, even discomfort and pain. When your body is clearing out toxins from the illness there may be many more symptoms. These symptoms might start - as soon as the illness is present. When your body detects an illness, it starts to feel the illness, to fight the illness, and to heal from the illness - all at once.

There are also symptoms that appear when you have recovered. If you were sick for a while, your body might feel agitated, eager to get moving, stretching, etc.

When you take medications for an illness it gets even more complicated. There are many symptoms that might result from the medication. Some aspects of medication might make you 'healthier', which will cause specific symptoms. Many medicines are toxic and have a wide variety of symptoms as a result. Clinical testing of medications does not attempt to distinguish between 'healthy' effects and 'unhealthy' effects of a medicine. Side effects are listed, often without judgment or analysis of their cause or meaning.’

Kolenchuk, T., Founder, Freedom, P.H., Healthicine, to, Health, T. of, Arts, T. and Health, S. of (2015) Are your ‘side effects’ symptoms of illness or Healthiness? Available at: http://www.greenmedinfo.com/blog/are-your-side-effects-symptoms-illness-or-healthiness (Accessed: 2 April 2016).

Ill baby (skin reddening)

Choices, N. (2015) Skin rashes in babies - NHS choices. Available at: http://www.nhs.uk/conditions/skin-rash-babies/Pages/Introduction.aspx (Accessed: 2 April 2016).

Technical lesson four:

Model name: Lia
Skin type: combination
Skin tone: medium skin with yellow undertones
Natural eyes/contacts: natural eyes
Allergies: none
Medication: none
Any open wounds/scars, cuts etc.: none

Required products/materials: cleanser, toner, moisturiser, cotton pads, water/contact lens solution, liquid latex, glycerin, stipple sponge, Kryolan camouflage concealer palette, Kryolan supra colour palette, and makeup brushes.

What is glycerin?

Also known as ‘Glycerol’, this product is an oily liquid used for sweat, tears, and raindrops on the face/body or lymph on a burn for instance. It can also be mixed with gelatine. Glycerin is sold in most high street chemists. Glycerin is non-volatile and intensely water-loving, meaning it draws water to itself from the surrounding it’s in. It is also often added to face/body paint for an added glossy shine.

Image reference: Dmedia, 2 (2016) Kryolan glycerine. Available at: http://www.screenface.co.uk/sfx/blood-sweat-tears/tears/kryolan-glycerine.htm (Accessed: 2 April 2016).

Step-by-step guide:

Before starting the practical, I set up my station and got rid of any bags, scarves and coats that were in the way for health and safety reasons. I then placed a towel around my model again for hygienic, health and safety reasons. Next, I cleansed her. This is an essential part of basic skin care routine used to wipe of the oil, makeup and dirt off the face to leave the skin looking clean and tight. I applied a bit of cleanser onto a cotton pad, and gently wiped it on the face. I then toned her face. I always do this after cleansing to shrink pores, give the skin pH balance, remove any dirt the cleanser didn’t and hydrate the skin. Again I applied a bit of toner onto a cotton pad, and gently wiped it on the face. The last part of the cleansing routine is to moisturise the face to smoothen/silken it. This method is good
for those especially with dry skin in order to hydrate it. I did this using my hands. (Make sure they’re clean!)

For this look, we first started concealing out any spots or blemishes on the skin. I used shade D3 from the Kryolan camouflage concealer palette using a thin flat concealer brush. Sue told us it’s best to use our fingers to blend out the edges of the concealer onto the rest of the skin. The look we were trying to achieve was a high temperature/fever, meaning we had to make the face red and sweaty. Often a fever results to red eyes and a tired face results to bluey/brown eyes. To create this effect, I applied some red (079) from the Kryolan supra colour palette using a stipple sponge. I used a very small amount of this as I wanted it to remain as natural as possible. I also patted the colour in some areas using the heat from my fingers. I made sure I went into the hairline, nose and ears. Once I was happy with this, I moved onto the black eye.

What is a black eye?

‘A black eye is bruising to the tissue under the skin surrounding your eye. It's usually caused by a blow to the face, such as a punch, or an accident such as a fall. Sometimes, a black eye can occur after cosmetic surgery to the face, such as a facelift or a nose operation.

The area around the eye turns bluish or purple because tiny blood vessels under the skin burst and blood leaks out into surrounding soft tissue. Your skin may be painful and swollen and may make it difficult to fully open your eye. Your vision may also be temporarily blurred and you may have a headache.

A black eye is not usually serious and you can usually look after it at home if there are no signs of a severe injury. After a few days, the swelling around your eye will start to go down and the bruise will turn brownish-yellow before eventually fading. Like any other bruise, a black eye will usually take about a week or two to heal completely.’

Choices, N. (2015) Black eye - NHS choices. Available at:
http://www.nhs.uk/conditions/black-eye/Pages/Introduction.aspx (Accessed: 2 April 2016).

What is a bruise?

Bruises are coloured patches that appear on the skin when blood vessels, called capillaries break or burst underneath the skin. Red blood cells leak out of these blood vessels which causes a bluish, reddish or blackish mark. Bruises go through colour changes as the body begins to heal. When the colour changes, this means the body is metabolising which is the process that the body goes through to repair itself.

The phase of a bruise:

1. A bump will occur that may look red/purple. The bruising may be tender or swollen.

2. After a few days, the bruise will turn blue/black.

3. After about a week it will start to look green/yellow.

4. After about two weeks the bruise will most likely be a very light brown, and then fade away by time.

To reduce the swelling of bruises, ice must be used right after you receive the bruise. People with dark skin can bruise also, however it shows up more on fair skin. Some people also tend to bruise easier than others; especially the elderly as their skin in thinner and the tissue underneath is more fragile.

Example of a black eye

Hellem, A. (no date) How to treat a black eye. Available at:
http://www.allaboutvision.com/conditions/black-eye.htm (Accessed: 2 April 2016).

Continuing on the step-by-step guide, to create the bruise we had the option of using our supra colours or Sue’s bruise colour wheel. (A bruise colour wheel is crème based makeup placed in a wheel consisting of different colours, used to create realistic bruises. They can be applied directly to
dry skin). I firstly went in with the same red I used earlier from the supra colour palette and applied this gently onto the eyelid using my fingers. (Make sure your nails are cut otherwise this will irritate the models eye). You want to make sure u get the colour right down to the eyelash so it’s best to use a thin shadow brush, preferably pointy. Dab/feather to colour onto the eye rather than dragging it. The brush can also be used in a circular motion to help with the blending. I went right into the inner corners as well as the socket line. I also mixed some black (071) with the red to achieve a dark red
and applied this on the under eye crease. With bruises, you can apply colour over colour so I decided to mix some blue (091) with the same red and apply this again in the inner corners and under eye crease. You can wipe off any mistakes with a cleanser using cotton buds. To finish off my bruise,
I added a small amount of moisturiser on the eye so add some shine. You’re more than welcome to apply this anywhere on the skin where u think it’s required. Do not however apply powder as this takes the shine away, making it look unrealistic. For extreme black eyes, Sue told us we can also use silicone. It’s also important to consider what stage your bruise is in e.g. early/late before creating it.

I next moved onto the lips. I wanted to make them look dry therefore I applied a very small amount of liquid latex using a small stipple sponge. I patted this onto the lips to give it a flaky effect. Ensure to go over the edges of the lips to create sores. You also have the option of achieving this effect using DUO.

After, I achieved the sweat effect. To do this, I put glycerin on the back of my hand and dabbed it on the upper lip, neck and nose using a stipple sponge. It’s also optional to apply water on the hair and back of the neck to achieve sweat however glycerin is better as it doesn’t run down the face.

For the tear application, tilt the models head backward and drop some water/contact lens solution or normal eye drops into the eye. (This is completely safe to use in eye; make sure u are 100% sure a product is meant to be used inside/around of an eye before you apply anything due to health and safety reasons). Remember tears fall out the inner corners of the eye. You could also lengthen the tear by applying glycerin down the cheek. For tears, do this just before a shoot/scene (last minute) otherwise the effect will disappear after a few minutes or so.

Reflection:

I was very pleased with my overall look. I think the application of everything was very balanced (not too much or not too little). The only feedback I received from Sue was that I could apply more purples/blues into my black eye. I also could’ve applied some water on the neck/hairline to give it an extra sweaty effect.

Key notes (taken in class):
  • In film/TV, less is more.
  • Don’t create unnecessary spots/scratches for continuity. 
  • Always try new products on the back of your hand before trying them out on someone’s face. 
  • Research an illness and the effect it has on the skin before applying anything. 
  • You could draw stencils for continuity. 
  • You could use food colourings to colour inside the mouth. 
  • It’s easier for a male model to grow a beard rather than you create one for continuity. 

Friday, 25 March 2016

Technical - burns

‘Burns are among the most common household injuries, especially in children. The term burn means more than the burning sensation associated with this injury. Burns are characterized by severe skin damage in which many of the affected cells die. Depending on the cause and degree of injury, most people can recover from burns without serious health consequences. More serious burns require immediate emergency medical care to prevent complications and death.

There are three primary types of burns; first, second, and third-degree. Each degree is based on the severity of damage to the skin, with first degree being the most minor and third degree being the most severe. Damage includes:


  • First degree burns – red, non-blistered skin
  • Second degree burns – blisters and some thickening of the skin
  • Third degree burns – widespread thickness with a white, leathery appearance 

There is also technically a fourth-degree burn. In this type, the damage of third-degree burns extends beyond the skin into tendons and bones. Burns have a variety of causes, including:

  • scalding from hot, boiling liquids
  • chemical burns
  • electrical burns
  • fires, including flames from matches, candles, and lighters
  • excessive sun exposure

The type of burn is not based on the cause of it. Scalding, for example, can cause all three burns, depending on how hot the liquid is and how long the skin makes contact. Chemical and electrical burns warrant immediate medical attention because they can affect the inside of the body, even if skin damage is minor.

First degree burns:

First-degree burns cause minimal skin damage. They are also called ‘superficial burns’ because they affect the outermost layer of skin. Signs of a first-degree burn include redness, minor inflammation, swelling, pain, and dry peeling skin (occurs as burn heals). Since this burn affects the top layer of the skin, the signs and symptoms disappear once the skin cells shed. First-degree burns usually heal within three to six days. Still, you should see your doctor if the burn affects a large area of skin (more than three inches), and if it’s on your face or a major joint.

First-degree burns are mostly treated with home care. Healing time may be quicker if you treat the burn sooner. To treat this type, you can:

  • soak the wound in cool water for five minutes or longer 
  • take acetaminophen or ibuprofen for pain relief 
  • apply aloe Vera gel or cream to soothe the skin 
  • use an antibiotic ointment and loose gauze to protect the affected area 

Make sure you don’t use ice, as this may make the damage worse. Never apply cotton balls to a burn because the small fibres can stick to the injury and increase the risk of infection. Also, avoid home remedies like butter and eggs as these are not proven to be effective.

Example of a first degree burn
adminnn (2013) ‘BurnFree’, 4 March. Available at:

Second degree burns:

Second-degree burns are more serious because the damage extends beyond the top layer of skin. This type of extensive damage causes the skin to blister and become extremely red and sore. Some blisters pop open, giving the burn a wet appearance.

Due to the delicate nature of such wounds, frequent bandaging is required to prevent infection. This also helps the burn heal quicker. Some second-degree burns take longer than three weeks to heal, but most heal within two to three weeks. The worse the blisters are, the longer the burn will take to heal. In some severe cases, skin grafting is required to fix the subsequent damage. Skin grafting borrows healthy skin from another area of the body and replaces it at the site of the burned skin.

As with first-degree burns, avoid cotton ball wraps and questionable home remedies. You can generally treat a mild second-degree burn by: 

  • running the skin under cool water for 15 minutes or longer 
  • taking over-the-counter pain medication (acetaminophen or ibuprofen) 
  • applying antibiotic cream to blisters 

However, seek emergency medical treatment if burns affect a widespread area of the face, hands, buttocks, groin and feet.

Example of a second degree burn
Created and 1, A. (2016) FX makeup- 2nd degree burn. Available at: http://www.fashionindustrynetwork.com/photo/fx-makeup-2nd-degree-burn?context=user (Accessed: 24 March 2016).

Third degree burns:

Third-degree burns are the worst burns. They cause the most damage, extending through every layer of skin. The damage can even reach the bloodstream, major organs, and bones, which can lead to death.

There is a misconception that third-degree means most painful. With this type of burn, the damage is so extensive that you may not feel pain because your nerves are damaged. Depending on the cause, third-degree burns cause the skin to look waxy and white, charred, dark brown, raised and leathery.

Never attempt to self-treat a third-degree burn. Call 999 immediately. While you’re waiting for medical treatment, raise the injury above your heart. Don’t get undressed, but make sure no clothing is stuck to the burn. There is no set healing timeline for third-degree burns.

Complications:

Third-degree burns carry the most risk for complications, such as infections, blood loss, and shock. Still, this doesn’t mean that minor first and second-degree burns can’t cause complications. All burns carry the risk of infections because bacteria can enter broken skin. Sepsis, or a bloodstream infection, can occur in the most severe cases. This can lead to shock or even death.

Tetanus is another possible complication with burns of all levels. Like sepsis, tetanus is a bacterial infection. It affects the nervous system, eventually leading to problems with muscle contractions. As a rule of thumb, every member of your household should receive updated tetanus shots every five years to prevent this type of infection.

Severe burns also carry the risk of hypothermia and hypovolemia. Hypothermia is characterised by dangerously low body temperatures. While this may seem like an unexpected complication of a burn, the condition is actually prompted by excessive loss of body heat from an injury. Hypovolemia, or low blood volume, occurs when your body loses too much blood from a burn.

Scars are a complication of all burns. Severe burns may cause keloids, which are discoloured areas of scar tissue on the skin. While keloids aren’t harmful in themselves, they can be bothersome. The appearance of scar tissue can worsen with sun exposure, so be sure to wear adequate sunscreen on any exposed areas.

Example of a third degree burn
Housewife, T.G. (no date) References for SFX makeup. Available at: https://uk.pinterest.com/pin/408138784954099662/ (Accessed: 25 March 2016).

Outlook for burns:

When properly and quickly treated, the outlook for first and second degree burns is good. These burns are also less prone to scarring. The key is to minimize further damage and infection. Extensive damage from severe second degree and third degree burns can lead to problems in deep skin tissues, bones, and organs. Patients may require:

  • surgery
  • physical therapy
  • rehabilitation
  • lifelong assisted care
  • counselling’

Written and SolanMedically, M. (2005) Burns: Types, treatments, and more. Available at: http://www.healthline.com/health/burns#Complications6 (Accessed: 25 March 2016).

Technical lesson three:

Model name: Simona
Skin type: dry
Skin tone: fair skin with yellow undertones
Natural eyes/contacts: natural eyes
Allergies: none
Medication: none
Any open wounds/scars, cuts etc.: none

Required products/materials: Kryolan supra colour palette, spatula, synthetic pus, Kensington Gore fake liquid blood, stipple sponge, witch hazel, Kryolan translucent powder, clear gelatine nuggets, a microwave, cotton buds, moisturiser, a hairdryer, Vaseline and cheap makeup brushes (don’t use your beauty ones as they’ll get ruined).

Gelatine nuggets:

‘SFX nuggets are re-mixed meltable gelatine blocks that is gently heated in a microwave. It is an ideal medium for gaining invaluable understanding and technical skills for working with 3D l prosthetic media. By its very nature gelatine has inherent advantages not found in latex:

  • Economical – gelatine is inexpensive which makes it ideal for experimentation. 
  • Reusable 
  • Timing – gelatine setting time can be shortened by placing moulds in the freezer. 
  • Blending – making your prosthetic appear as natural as possible, with gelatine, the edges can be blended away with witch hazel. 
  • Translucency – gelatine enables it to move well on the model. 
  • Non-toxic 
  • Safety – gelatine is safe to use on all skin types as the ingredients used in gelatine formulas are either food or medical grades.’ It is however a sin to apply gelatine on a Muslim model, therefore ask them for permission beforehand. It’s also unacceptable to apply this product on a vegan so it’s very important for you to make sure your model knows exactly what you’re using. 
  • Clear – goes on all skin types/colours. 
  • Doesn’t expire once stored in a cool dry place. 
  • Nuggets have a very firm texture and can be used on moulds. This is a plus point for continuity as you can create the same shape. 
  • Gelatine can be used on the hair, face and clothing.

Dmedia, 2 (2016) Mouldlife Gelatine Nuggets. Available at:

Gelatine (leaf) – this is hardened gelatine in leaves used to stimulate burns and for effects on the fingernails. To apply this product, dissolve gelatine in boiling water and apply it directly to the skin when cooled down.

Gelatine (powder) – this is a food product made from the crushed bones of animals used in food and sweets. Gelatine makeup is pork based, low cost, accessible and flexible. It’s also reusable (just needs to be cleaned and re-melted) and a good value alternative to silicone. This product is mainly used for creating effects like burns, open wounds and scars. For use in special effects makeup, the powder must be mixed with boiling water to become thick like porridge. (Food colouring can also be added during this stage to change the gelatine colour). Next, glycerine must be added to slow down the drying process and prevent the gelatine from shrinking and hardening. Little bits of tissue or cotton wool can be added to the mixture also. Once cooled down, apply it to the skin. When the gelatine is dry it can be painted with cream based makeup. Effects made using gelatine aren’t durable as the substance is perishable. This type of gelatine is said to be unprofessional for use in the industry.

What is synthetic pus?

‘Synthetic pus effect is a preparation for special visual effects in a suitable consistency, colour and hygienic cosmetic quality. It is advisable to use this product only in little amounts for a realistic effect. This is glycerine based and safe for use around the mouth and mucus membranes.’

PROFESSIONAL, K. (2016) Professional make-up. Available at:
https://us.kryolan.com/product/synthetic-pus-effect (Accessed: 25 March 2016).

Witch hazel:

‘Gelatine prosthetics may be thinned or dissolved with witch hazel. Warm witch hazel works best but whether witch hazel dissolves or corrodes is debated. Many artists leave a bit of the overflow on the blending edge so that during application they can pull the blending edge out as it is adhered and then use witch hazel to cut away the edge.’

Gelatin (1939) Available at:
http://fx.wikia.com/wiki/Gelatin (Accessed: 25 March 2016).

Step-by-step guide:

Before starting the practical, I set up my station and got rid of any bags, scarves and coats that were in the way for health and safety reasons. I then placed a towel around my model again for hygienic, health and safety reasons. Next, I ensured the area I was working on was clean (the arm). Simona had no product on her arm therefore I was able to start my burn straight away. Sue told us we shouldn’t apply barrier cream when working with gelatine therefore I skipped this step.

Firstly, we got given a chunk of gelatine each and placed it in a bowl. We then put it into a microwave for 20 seconds. (Don’t put anything with metal into the microwave). After it had melted, I tested this on the back of my hand using a spatula to ensure it’s not too hot. I felt like it irritated my hand due to its heat therefore I left it to cool down for a bit before applying it onto my model. It’s always good to ask your model if he/she is comfortable with the temperature of the gelatine before applying it all over the arm or wherever u choose to create your burn.

Once it’s cooled, using your spatula spread this across the arm like you would to Nutella on a toast. If you want to create blisters, plop the spatula on the skin. If you want it to be risen, raise the spatula (upward direction). In order to break up the edges, pick the spatula up and down. In order to get rid of all hard edges, apply witch hazel onto a cotton bud and blend this downwards (toward the outer skin).

Once you’re happy with the application of your gelatine, it’s time to dry it using a hairdryer. Ensure to use cool air as hot will melt it. The gelatine will stay tacky. Your finger will stop sticking to it as much when it’s dry and that’s when you can stop. It’s now time to set it with the Kryolan translucent powder and a powder puff (brush).

You can now begin to colour. You must think about light and shade. I created a third degree burn therefore I went in with a red (079) from the Kryolan supra colour palette using my stipple sponge. It’s best to dab the colour on for a more realistic effect. I also applied some black (071) using a thin brush onto the deeper areas I had picked out beforehand using my spatula. I did this using a cheap paint brush as I didn’t want to ruin my beauty ones. For some areas of the burn I mixed red and the black together to achieve a reddish brown. I rubbed the colour sideways in order to blend it out toward the rest of the skin. It’s optional to use moisturiser to thin out the colours. Sue also told us we can mix supra/aqua colours with gelatine beforehand to give the actual gelatine some colour instead of it being clear. One thing however you shouldn’t do is to colour the burn with foundation. 

Once I was done with the colouring, I applied some of Sue’s Kensington Gore fake liquid blood. I used a stipple sponge to apply this blood around areas I thought needed emphasis. I also used some synthetic pus from Kryolan, again in the deeper areas I had created. Don’t go too over the top with the blood/pus and it’ll take the eye away from the actual burn.

Remember you can use your fingers also to apply any product such as supra colour or blood. To give the burn an extra shine, apply Vaseline.

To remove the burn, you can gently peel the gelatine off the arm. Clean off any remaining makeup from the skin with a cleanser and wash thoroughly with water. Moisturisers can also be used after removal to prevent the skin from drying. In order to clean the bowls, wash them thoroughly with hot water. Dispose of any gelatine remaining in the bowl. 

Reflection:

Overall I was happy with the result of my third degree burn. I thought the colouring was good however I wasn’t so impressed with the edges. I felt like it needed to be softened down a lot more with the witch hazel. I also think I should’ve applied more colour to the outer areas of the burn to make it look more realistic. Other than that, Sue said she was very impressed with my choice of colours and use of sytnehtic pus on my burn. 

Thursday, 24 March 2016

Technical - cuts

‘Cuts are injuries in which the outer skin barrier has been penetrated. Symptoms range from narrow tears in the skin (cuts) to superficial abrasions (scrapes) to deep holes (punctures). Usually bleeding occurs, though some puncture wounds may bleed only slightly. Because any such injury leaves you prone to infection, the damage needs to be dealt with immediately.

Cuts - typically caused by a sharp implement with an edge that may be smooth (a knife or a razor blade, for example) or jagged (a piece of broken glass). If the cut is deep, it will bleed profusely, and there may be damage to underlying muscle, tendons, and nerves.

Scrapes - results from skin being rubbed against a rough surface like pavement. The outer skin layer may not be completely broken, but because small blood vessels are ruptured, the skin may ooze blood.

A puncture wound - caused by a nail, pin, or other sharp object with a penetrating point.’

Common injuries (2014) Available at:

How do cuts and scratches heal?

‘After getting a cut, scratch, or abrasion, your skin may start bleeding. This happens because the injury breaks or tears the tiny blood vessels, which are right under the skin's surface. Your body wants to stop the bleeding so the platelets in your blood come to the rescue.

At the site of a wound, platelets stick together, like glue. This is called clotting, which works like a plug to keep blood and other fluids from leaking out. Ascab, a hardened and dried clot, forms a crust over the wound. This protects the area so the skin cells underneath can have time to heal.

Underneath the scab, new skin cells multiply to repair the wound. Damaged blood vessels are repaired, and infection-fighting white blood cells attack any germs that may have gotten into the wound. You can't see it under the scab, but a new layer of skin is forming. And when the new skin is ready, the scab falls off. A scab usually falls off within a week or two. If you pick at a scab, the new skin underneath can be ripped and the wound will take longer to heal and may leave a scar. So try not to pick at scabs.

What should I do if I get a cut/scratch?

Stop any bleeding by pressing a clean, soft cloth against the wound. If the wound isn't very bad, the bleeding should stop in a few minutes. Then you'll want to clean the wound, using warm water and a gentle soap.

Most small cuts, scrapes, or abrasions will heal well without any special care. For extra protection, your parent you might use an antibacterial ointment or a bandage. The ointment will kill germs and a bandage will keep your wound from getting irritated and prevent germs from getting inside. If you use a bandage, it should be changed daily and when it gets wet or dirty.

What if a cut won't stop bleeding?

If a wound is very long or deep or if its edges are far apart, then you may need stitches. The doctor will use some type of anesthetic on your skin to numb it. Numbing medicine might be applied directly or through a shot. Then the doctor will suture or sew the edges of the cut together with a small needle and special thread.

For more minor cuts, the doctor might use a special kind of glue to close your cut instead of stitches. This glue holds the sides of the cut together so the skin can begin to heal. The glue will dissolve over time.

If you do get stitches, after the wound heals (in about a week) you will need to go back to the doctor to get those stitches taken out. The doctor will just snip the thread with scissors and gently pull out the threads. Sometimes the doctor may use stitches that dissolve on their own over time and don't need to be removed. Also, sometimes a small scar forms after stitches are removed. If you don't get the proper care for a serious cut, a more noticeable scar may form.’

document (2015) Checking out cuts, scratches, and Abrasions. Available at: http://kidshealth.org/en/kids/cuts.html# (Accessed: 24 March 2016).

An example of a cut

Cuts, general info (no date) Available at:
http://www.utahmountainbiking.com/firstaid/cuts.htm (Accessed: 24 March 2016).

We didn’t actually have a lesson on cuts; however I decided to try some out myself at home with SFX products I had purchased beforehand from Kryolan. I discovered different methods in order to create cuts/scars:

Model name: Fatemeh (myself)
Skin type: combination
Skin tone: olive skin with yellow undertones
Natural eyes/contacts: natural eyes
Allergies: none
Medication: none
Any open wounds/scars, cuts etc.: none

Required products/materials: Kryolan Pro shield barrier foam, rigid collodion, a hairdryer, Kryolan supra colour palette and cheap makeup brushes.

Rigid collodion:


This clear solution is widely used in special effects makeup to stimulate shapes of wounds and scars and works by wrinkling the skin as it dries after application. The more coats applied, the deeper/larger the scar. Colours can also be used to stimulate a fresh wound. It’s often applied with a brush in multiple coatings. Rigid collodion should peel off easily after one day, taking off any layers of dead skin however collodion remover is also available on the market if required. Repeated used in the same area can cause irritation to the skin. This product was originally created during the Second World War, used to restrict open wounds and stop bleeding.

Supply, F.B. (2016) Kryolan rigid Collodion .85oz Frends beauty supply. Available at: http://www.frendsbeauty.com/kryolan-rigid-collodion-85oz.html (Accessed: 24 March 2016).

Step-by-Step guide (rigid collodion):

Firstly I ensured the area I was working on was clean (the arm). I had no product on my arm therefore I applied a small amount of the Kryolan Pro shield barrier foam on the area I wanted to work on. Next, I mixed red (079) and white (070) together from my Kryolan supra colour palette together to achieve a pinky red. Using a thin paint brush, I applied a thin line on my arm. Normally light colours are used to give the impression of a fresh scar and darker colours are used for older scars.

After, I applied rigid collodion on the same line I applied my supra colour on. I did this how I would normally apply nail polish. Next I squeezed this area of my arm and dried it using a hairdryer. I made sure the air blowing is cool in order to not irritate my arm. It’s important to remember the first coat of collodion you’ve applied is completely dry before applying the next. The more coats you apply, the deeper the scar. Don’t apply more than 7 coats.

It’s completely optional to apply foundation around the scar or you may just go in with your supra colours again, with colours such as red to achieve a realistic effect. Do NOT apply translucent powder over this.

Note: do not apply rigid collodion anywhere near the eye area. Also don’t use scarring liquids on areas with hair as it may result in a painful removal.

You can remove this product by just peeling it off however if you have applied a bit too many coats you can use solvents such as acetone or almond oil (both completely safe to use on the skin) with a cotton pad to remove the collodion.

My first attempt at a cut with rigid collodion

Reflection:

I preferred making wounds with cine wax than doing it with rigid collodion as the effect didn't really stand out to me. It's not something that interests me, also was a pain to take off. It irritated my arm and left it red for a while. It's good if you were looking to do a light SFX look, however I didn't think it was that great.

Model name: Fatemeh (myself)
Skin type: combination
Skin tone: olive skin with yellow undertones
Natural eyes/contacts: natural eyes
Allergies: none
Medication: none
Any open wounds/scars, cuts etc.: none

Required products/materials: Kryolan Pro shield barrier foam, rigid collodion, spatula, a hairdryer, Kryolan supra colour palette, Kryolan translucent powder and cheap makeup brushes.

I also tried another cut using Tuplast. This is a thick substance in a tube used to stimulate blisters and create waterproof injuries. For masks, Tuplast is stretched into threads which are then mounted in the mouth to create slime/spit in the mouth. This product is also used for creating realistic scars, cuts and wounds on the skin with the use of tools and cotton buds. To do this, press the skin together around the Tuplast and blow-dry it with cold air. Tuplast is based on the synthetic material used in dental practices. It is available in both tinted and transparent. It can also be applied on easily using a spatula. It must not however be used near the eye area as it contains a strong component of acetone. Makeup can be applied onto Tuplast as soon as it has dried. Before application however, used barrier cream or Pros-Aide to make the removal easier. Removal can be done with Tuplast remover.

Kryolan Tuplast (no date) Available at:
https://www.vanitytrove.com/gb/p/kryolan-tuplast (Accessed: 24 March 2016).

Step-by-Step guide (Tuplast):

Firstly I ensured the area I was working on was clean (the arm). I had no product on my arm therefore I applied a small amount of the Kryolan Pro shield barrier foam on the area I wanted to work on. Next, I mixed red (079) and white (070) together from my Kryolan supra colour palette together to achieve a pinky red. Using a thin paint brush, I applied a thin line on my arm.

After, I applied Tuplast on the same line I applied my supra colour on. I shaped this using a spatula. In one of our practical lessons with Sue, she said we can pick at Tuplast with a hair pin or leave it to dry completely and powder it. I followed this step and used a hairdryer to dry it. I then powdered it using a big fluffy brush.

It’s completely optional to apply foundation around the scar or you may just go in with your supra colours again, with colours such as red to achieve a realistic effect.

Note: do not apply Tuplast anywhere near the eye area. Also don’t use scarring liquids on areas with hair as it may result in a painful removal.

You can remove this product by just peeling it off however if you have applied a bit too many coats you may use acetone or just water.

A scar with Tuplast

Reflection:

I liked working with this product more than I did with rigid collodion. I felt like it had more of a dramatic effect and stood out to me. It was also easy to remove. I'd definitely incorporate a scar similar to this for one of my special effects shoots. If I was to do this again, I'd apply more product around the scar to give it a realistic effect. I sort of left it plain on the arm and this doesn't look natural at all. It'd look a lot better with some liquid blood. 

Thursday, 3 March 2016

Technical - wounds

‘A wound is any type of injury to the skin. Wounds can be open wounds, in which the skin is broken or torn or closed wounds. Although open wounds can bleed and run the risk of infections, closed wounds can also be dangerous depending on the extent of tissue damage. There are six major categories of wounds; each is distinctive in its appearance and the source of the injury:

Incision – an incision wound is a cut in the skin caused by a sharp object such as a knife, broken glass, scissors or surgeon’s scalpel. Incision wounds are ‘neat’ and the edges of the skin are usually smooth.

Laceration – a laceration is injury to the skin that results in the skin being cut or torn open. Lacerations can be shallow, only injuring the surface skin, or deep, causing injury to the muscles, tendons, ligaments, blood vessels or nerves. Lacerations are most commonly made by some sort of blunt trauma such as being hit with a fist or baseball bat. Unlike an incision wound, a laceration is generally jagged because the skin is torn instead of cut.

Abrasion – an abrasion is a type of wound in which the skin is scraped or rubbed off. When skin is dragged on carpet, the resulting wound, often called a carpet burn, is an abrasion. Abrasions are usually superficial wounds, meaning that only the outer layers of skin are affected. A deep abrasion, one that penetrates to the inner layers of skin, can leave a scar. Parts of the body with thin layers of skin, such as the knees and elbows, are most prone to abrasions.

Contusion – a contusion is a kind of closed wound, meaning that the skin is not broken. Contusions are caused by blunt force trauma to the skin that results in tissue damage. When the blood vessels under the skin are broken, blood pools under the skin causing a bruise.

Puncture – a puncture wound is created when a sharp object enters the skin. These wounds are usually small and do not bleed a lot. Although these wounds tend to close over quickly, they still need treatment as infection is a possibility. Puncture wounds are prone to a tetanus infection, so it is important to seek medical advice for any puncture wound. Common types of puncture wounds include stepping on a nail or bites from animals.

Avulsion – an avulsion is a partial or complete tearing away of skin and tissue. Avulsions usually occur during violent accidents, such as body-crushing accidents, explosions, and gunshots. They bleed heavily and rapidly.’

Chandler, S. (2015) Five types of wounds. Available at:
http://www.livestrong.com/article/101274-five-types-wounds/ (Accessed: 3 March 2016).


Different types of wounds

Admin (2008) Types & causes of open wounds. Available at:
http://nursingcrib.com/nursing-notes-reviewer/types-causes-of-open-wounds/ (Accessed: 3 March
2016).

How are wounds treated?

‘Minor wounds can be treated at home. First, wash and disinfect the wound to remove all dirt and debris. Use direct pressure and elevation to control bleeding and swelling. When wrapping the wound, always use a sterile dressing or bandage (very minor wounds may heal fine without a bandage). You’ll need to keep the wound clean and dry for five days. You should also make sure you get plenty of rest.

Pain typically accompanies a wound. You can take acetaminophen as directed on the package. Avoid aspirin products, since they can cause or prolong bleeding. Apply ice if you have bruising or swelling, and avoid picking at scabs. If you’re spending time outdoors in the sun, use sun protection factor (SPF) 30 sunscreen over the area until it’s completely healed.

Medical treatments:

Your doctor may use different techniques to treat your wound. After cleaning and possibly numbing the area with anesthetic, your doctor may close the wound using skin glue, sutures, or stitches. You may receive a tetanus booster shot if you have a puncture wound.

Other treatments for a wound include pain medication and penicillin. Your doctor may also prescribe penicillin or another antibiotic if there’s an infection or high risk for developing an infection. In some cases, surgery might be needed. If a body part is severed, it should be brought to the hospital for possible reattachment. Wrap the body part in moist gauze and pack it in ice.

When you leave the doctor’s office, you might have bandages and dressings. It’s important to always wash your hands and work on a clean surface when changing bandages and dressings. Disinfect and dry the wound thoroughly before dressing it again. Ensure to dispose of old dressings and bandages in plastic bags.’

Written, Roddick, J. and HigueraMedically, V. (2005) Open wound. Available at: http://www.healthline.com/health/open-wound#Complications4 (Accessed: 3 March 2016).

History:

‘From the Classical Period to the Medieval Period, the body and the soul were believed to be intimately connected, based on several theories put forth by the philosopher Plato. Wounds on the body were believed to correlate with wounds to the soul and vice versa; wounds were seen as an outward sign of an inward illness. Thus, a man who was wounded physically in a serious way was said to be hindered not only physically but spiritually as well. If the soul was wounded, that wound may also eventually become physically manifest, revealing the true state of the soul. Wounds were also seen as writing on the "tablet" of the body. Wounds acquired in war, for example, told the story of a soldier in a form which all could see and understand, and the wounds of a martyr told the story of their faith.’

Wound (2016) in Wikipedia. Available at:
https://en.wikipedia.org/wiki/Wound (Accessed: 3 March 2016).

Technical lesson two:

Model name: Billy Eva Jolly
Skin type: combination
Skin tone: fair skin with pink undertones
Natural eyes/contacts: natural eyes
Allergies: none
Medication: none
Any open wounds/scars, cuts etc.: none

Required products/materials: sculpting wax (cine wax), Kryolan supra colour palette, Kryolan Pro shield barrier foam, wound filler, spatula, cleanser, Tuplast, sealer, fake pus, Kensington Gore a liquid blood, stipple sponge, Kryolan translucent powder, moisturiser, cotton buds and cheap makeup brushes (don’t use your beauty ones as they’ll get ruined).

Blood:

Artificial blood comes in different qualities and colours for different uses. Some are quite easily removed whereas others aren’t. The best ones often tend to look like dry blood once dry, while others look like red paint. Blood comes in different colour intensities therefore it’s important to consider how deep a wound is when making up the model to achieve realistic effects. 

Blood capsules – these are gelatine capsules containing blood. You must place the capsule in your mouth and break it with your teeth to bleed from your mouth.

Blood effect for eyes – this is a product used to make the eyes look bloodshot. In order to achieve this effect you must drip it into the eyes using the eyedropper. It will take about 15 minutes to work. For removal, use normal cleansing eye drops. This product comes in red, black, yellow and blue. It must be used within 25 days.


Thurman-King, L. (2014) Beauty Inspo: Red eyes at undercover fall 2014 -. Available at: http://www.thestylecon.com/2014/04/03/inspo-undercover-fall-2014-makeup/#!prettyPhoto/1/ (Accessed: 3 March 2016).

Blood powder – this is a pale red powder which becomes dark when mixed with water, often rubbed into the skin to create wounds.

Liquid blood – this product usually comes in a tub or tube. Liquid blood can dry up after a certain amount of time, however if a fair amount is used, it will remain wet which is perfect for dramatic scenes. Liquid blood is used to give more of a realistic effect on stage as it looks quite loose and wet. It’s also used in the TV department to replace human blood. Due to its liquid base it creates more of a realistic look.

Gel blood – This is another type of blood which is thick and remains wet when it is dry. It is mainly used to fill in cuts, wounds, rips and other injuries that may occur on the face/body which would require blood. It can be applied on with any type of brush depending on the size of the damage created on the face/body. Due to its glossy texture, it looks very realistic.

What is supra colour?

Supra colour, also known as grease paint is made of oil/crème, pigment, zinc oxide powder. They are very oily in consistency and texture. They are quite similar to aqua colours however much richer. This product is often used to help build character and effect such as bruises/injuries. It is easily applied on with a brush, sponge or the use of fingers and is also durable. Grease paints don’t run with sweat meaning they last long on performers. They blend well before it is set. In order to set it, you must use translucent powder otherwise it can start melting or smudging, especially under hot stage lights. If however you wish for the glossy appearance to remain, you may add a light coat of glycerine on top. Grease paints can also be used to change skin colour with the use of more product. To remove, use oil remover or a cleanser.

Dmedia, 2 (2016) Kryolan Supracolor palette 12 colours 12x3ml. Available at: http://www.screenface.co.uk/face-body-paint/grease-based/kryolan-supracolour-palette-12-colours.htm (Accessed: 3 March 2016).

What is sealer?

This can be a liquid or spray. Sealer is used to seal the makeup and keep it fresh and durable by coating the skin with a weightless and invisible film made from active hydrating ingredients. Beneath makeup, it prevents sweat and internal moisture and over makeup it seals and protects it from humidity, sweat and other environmental elements. A few coats must be applied to prepare a soft surface for brush/sponge application of makeup. This product is very comparable to liquid latex however dries faster. You can also put texture into the sealer by pressing it with a stipple sponge after applying the first coat. This however must be done before the application of primer, moisturiser or foundation. Sealers eliminate shine and prevent makeup from smudging onto clothes or other surfaces which makes them very ideal for heavy production requirements. It also spares the task of renewing powder applications and creates visible depth for close-up shots. This product can be used a non-drying thinner of water-soluble foundations. To remove, use cleanser or water.

Kryolan Sealer - permanent cosmetics (no date) Available at:
http://www.danceshopper.com/permanent-make-up.Kryolan_Sealer (Accessed: 3 March 2016).

What is cine wax?

Wax is used to build up facial areas, block out eyebrows, and smooth the edges on prosthetic pieces. Wax is soft, made from natural waxes such as bees wax. It is flexible and easy to work with as the heat from the hands softens it. It is often used to help build character by transforming the face, creating false bumps, scars etc. Wax is safe to use, durable and easily removed. It can be used to build up any area of the face provided that there is not too much movement of the underlying muscles. Places it has most effect on are the cheekbones, chin and the forehead. This product is widely used due to its moulding ability.

Kryolan Cine-Wax 40 G (no date) Available at: https://www.facepaintshop.eu/en/kryolan-special/2453-kryolan-cine-wax-40-g.html (Accessed: 3 March 2016).

What is wound filler?

This is a thick gel substance used for deep wounds which can be stiff and slow drying. It can be laid on in lumps, smeared or strung out to create quick and easy, yet realistic wounds/scratches. Wound fillers adhere well to the skin and works in particularly well when sealed with a plastic sealer/spray. It is very compatible with liquid blood and has good resistance to water effects. This product is very tacky, yet smooth and easy to use with the help of your fingers, a stipple sponge or a modelling tool. It also dries onto the skin so it doesn’t transfer. It remains flexible, is durable and safe to use on skin. Wound fillers can also be coloured with grease paint or makeup to alter its shade.

Makeup, T.P. (2016) Glynn Mckay wound filler - 60ml. Available at:
https://tiltmakeup.com/products/glynn-mckay-wound-filler (Accessed: 3 March 2016).

What is a stipple sponge?

This is a charcoal coloured web matrix filter sponge used for special effects and face painting. It is a textured sponge with lots of holes that when applied can give you a stubble effect. It can be used to create a variety of textures, bruises, and blood scratches. They also make great looking beard stubble growth. They vary in size. This type of sponge however can be quite rough to use on the face.

Step-by-step guide:

Before starting the practical, I set up my station and got rid of any bags, scarves and coats that were in the way for health and safety reasons. I then placed a towel around my model again for hygienic, health and safety reasons. Next, I ensured the area I was working on was clean (the arm). Billie had no product on her arm therefore I applied a small amount of the Kryolan Pro shield barrier foam (description of this product is written in my previous technical file) on the area I wanted to work on.

To create the wound, I scraped out some wax using a spatula. I rolled this in my hand to give it some body heat as the warmer the wax, the easier it is to work with. I then spread the wax along the area I put barrier cream on in a long line and smoothed the edges out with my spatula. To help me get it extra smooth, I applied some moisturiser to a cotton bud and went over the edges of the wax so that it melts into the skin. (You can also use acetone to smoothen the edges out). Once the wax became invisible, I used the edge of my spatula to cut a line along the centre of the wax. (As I wanted to create more of an open wound, I made sure the line is quite thick). Ensure this line is deep for a more realistic effect.

For this part, Sue told us it is optional to apply a thin layer of liquid latex over the wax with a cotton bud and dry it using a hairdryer until it goes clear. This was to help make the wound appear smoother. The wound I had created already looked smooth enough therefore I skipped this step and went in straight to the colouring. I first coloured the inside of the cut with black (071) supra colour using a thin brush (I had brought cheap paint brushes beforehand as I didn’t want to ruin my beauty ones). It was also optional to use Sue’s bruise wheel from Kryolan which consisted of deep plum colours however I stuck to my supra colours. For the outer corners of the wound I mixed red (079) and the black together to achieve a dark red. Sue said it is optional to mix our supra colours with IPA for a more pigmented look, however I thought the supra colour palette from Kryolan was already pigmented enough. I also applied red just around the cut, using a stipple sponge. I patted this on, as it irritates the skin to swish it around due to its texture. I also used my fingers to apply some of the same red on areas I thought needed colour. Ensure to blend this out for a more realistic effect.

Now this is the fun part. Once you’re done with the colouring, you can go in to apply the fake blood and wound filler. I took some wound filler out from its pot and applied it gently to the centre of the cut (where I applied the black) using the same brush. You don’t want to go too over the top with this as then it’ll just end up looking fake. I also used some of Sue’s Kensington Gore fake liquid blood. I used a stipple sponge to apply this blood around the cut and empty areas of the arm. Using a fan brush, I also flicked some blood onto the cut which Sue had taught us how to in the demo. She also said it’s optional to use a hair pin to apply the blood or wound filler.

‘Kensington Gore (a pun on the London Street) is a trademark for fake blood used in films and in theatre. It was manufactured by a retired British pharmacist, John Tinegate, during the 1960’s in the village of Abbotsbury, Dorset. Many varieties of blood, having various degrees of viscosity, shades and textures are available. Since Tinegate's death, the name "Kensington Gore" has become a generic term for stage blood. Kensington Gore was used in the film The Shining.’

Theatrical blood (2016) in Wikipedia. Available at: https://en.wikipedia.org/wiki/Theatrical_blood#Kensington_Gore (Accessed: 31 March 2016).

To remove the open wound, you can gently peel the wax off the arm. You can use spirit gum remover also to take away all the excess wax. To do this, soak around the edges of the wound with a cotton bud soaked in spirit gum remover and leave it for a minute or two. Work gently around the edges in order to remove the wax off the skin. Clean off any remaining makeup from the skin with a cleanser and wash thoroughly with water. Moisturiser can also be used after removal to prevent the skin from drying.

What is spirit gum remover?

Spirit gum remover is a specifically developed solvent designed to gently remove makeup adhesives such as spirit gum. It is completely safe to use and doesn’t damage the skin.

Reflection:

Overall, I was very proud of my open wound. It was my first time doing a wound like this, as the previous ones I had done weren’t so big. Sue gave me great feedback and said the wax is blended well into the skin. The only thing she said is to apply more colours onto the rest of the arm, so it doesn’t look so stuck on. If I was to do this again, I’d probably blend out the edges using acetone instead of moisturiser. I’d also make sure I stipple red pigment such as blood onto all areas of the arm and not just the wound itself.

Key notes (taken in class):
  • In the industry, injuries change over a time e.g. bruising gets lighter. 
  • There is also fake glass available to purchase to incorporate into wounds/cuts. 
  • You can put fake blood on clothing. 
  • When doing work on the arms/hands, don’t forget to apply product on the knuckles.